Wednesday, December 5, 2012

Netting: single spike or double spike posts?


Single Spike—post stake consists of one spike (left post).
Double Spike—post stake consists of two spikes (right post).

Which one to use, and when:

Single spike is best used when netting is moved frequently or in dry/hard soils.
  •  In dry soils it is often difficult to insert one (let alone two) stakes into the ground. Often there is a crack in the ground that a single stake can be inserted.
  • The single spike enables the post to be quickly pulled out of the ground so the net can be reset.  
  • Easy to take down and store. 

Double spike nets are best when the netting is not to be frequently moved, the ground is soft or the installer prefers a step-in post.
  • The crosspiece on the double spike enables the post to be “stepped-in.” This action reduces the hand/arm strength needed to insert the post. 
  • Do not pound on the stake with a hammer in order to insert it into the ground. It is not designed for this. 
  • Added stability in loose soils. 
  • Can be hard to pull out.
  • Harder to take down and store (spikes are easy to tangle).
What is our experience with SS or DS? Many of the nets that we use on the farms are single spike nets. We frequently move netting (unless it is PermaNet) and have dry soils in the summer. So single spike nets are more practical for our fencing needs. 

My main experience with double spike occurred a summer ago while fencing a cattle pasture. I was attempting to install some double-spike netting shortly after a week of 100° heat and no rain for the last month. The ground was hard and dry and the posts refused to go into the ground. Frustrated, I went for my hammer and began to pound directly on the cross piece of the stake. The ground continued to resist. By the time I “finished”, the stakes were less than 3" into the ground and bent beyond usefulness (the stakes are meant to be stepped-in, not hit with a hammer). The proper move would have been to use either single spike posts or drill pilot holes for each stake. 

However, in the Spring when the ground is moist, I prefer to use double spikes for a semi-permanent poultry enclosure. The spikes provide added stability and step into the ground easily. Functionality depends on the specific fencing situation.

What do our customers prefer to use? Right now 2/3 of the ElectroNet that goes out our door is single spiked. However, double spike netting is becoming more and more popular and the gap between the two is shrinking. 


Tuesday, December 4, 2012

Cold Weather Shepherding tips


It’s December which means winter—in theory—will be here soon. Currently it is 66° in Washington, IA but that could change to 10° in an instant (after all, it is Iowa weather). Here are a few tips for dealing with the highly anticipated cold weather.

  • Gordon Shelangoski (Premier product consultant and shepherd) utilizes molasses tubs as a supplement to his stockpiled forage. The added energy provides what the late season forage can't. Gordon can graze his ewes longer without having to provide stored feed. Purchasing a few tubs pencils out to being more cost efficient for Gordon than buying in hay. If you choose to try molasses tubs, make sure they are formulated for sheep specifically. Non-sheep specific tubs have high copper levels which leads to copper toxicity in sheep. 
  • Make sure the water supply is winter ready. Add tank heaters and know your protocol for frozen tanks and hydrants. Water is especially important during late gestation and lactation.
  • If you buy-in feed, make sure it is either on your farm or at least spoken for. Searching for hay in mid-winter is not going to be the most cost effective means of procuring feed.
  • Machinery needs to be in good repair and ready to run in the winter. If you run a diesel, make sure to have winter blended fuel or at least a bottle of anti-gel additive. 
  • Temporary fencing that will not be used during the winter needs to be picked up and stored. This reduces the chances of it being damaged by snow, ice and animals.
  • Fences that will be in use throughout the winter need to be functional. Go through and remove overgrowth/fallen limbs that may reduce the strength of the pulse going through the netting. If you have a fence that can be modified into pos/neg, do so. This will allow the fence to function better with deep snow.
  • If your winter plans involve lambing, make sure the lambing barn/area is cleaned and ready to handle sheep. Set up lambing jugs and pens ahead of time. 
  • Make sure your lambing kit is ready. You do not want to be out of teats for bucket teat units when you have orphan lambs. Being prepared ahead of time saves a trip to town when you need to be treating a ewe or lamb. 


Wednesday, October 24, 2012

Lamb face salad? Why not?

When Stan travels and has lamb he usually shares his experiences with the folks at Premier and in the newsletter. I recently took a trip out East and had lamb for a meal. I thought I would share my experience.

Once the Equipment Catalog was off to the printers, I was able to take a break from writing and found the time to go to New York City. Part of the trip was to visit my sister and her family. But the main reason was to try some of the more unconventional foods available.

I was in my sister's apartment only a handful of minutes before I was out the door and on my way to find lunch. After a few miles on the subway, I walked up and out of the subterranean tunnels into a series of sights and smells I've never experienced. I had entered the heart of Chinatown.

The destination was Xi'an Famous Foods, home to a dish known as Spicy & Tingly Lamb Face Salad. I did some research prior to my visit and one of the recommended foods was lamb face salad. My inner foodie screamed for a challenge to my palate, so I gave in.

Spicy and Tingly Lamb Face Salad. It appears much more appetizing in person as the camera does not do it justice. 

The decision was quickly in jeopardy once I walked through the door. The wall across from the register contained photos of all the potential meals I could have. Lamb burgers, lamb soup, chicken and pork dishes galore adorned the wall. Finding more options than I could eat, I had trouble deciding to stick with the salad. Do I go with the salad or something else? I ordered the savory looking Spicy Cumin Lamb with Hand-Ripped noodles in soup. Yet again I debated my decision and asked to change my order to the lamb face salad. I paid, received my ticket number and sat at a long table at the back of the restaurant. Playing on the TV was a cooking show featuring lamb face salad as well as demonstrating the process of making hand-ripped noodles.

My number came up and I received not one but two entres. Through my inability to make a decision and ensuing miscommunication I had ordered both the soup and the salad (no breadsticks). So much the better as it turns out. I returned to the table and began relishing in the double order.

With chopsticks in hand I went for the salad. My taste buds first caught a taste of cilantro, but the heat soon kicked in. My lips tingled and my eyes watered. This cold salad packed a hidden whollop. I tried a piece of lamb. Oh my! The flavor was out of this world. Despite not being a conventional cut of meat, the face was quite good. It was not a lamb chop but after all it's not suppose to be. I would later look up the contents of the salad: head meat (hence face), chili oil, szechwan pepper corns, bean sprout, cucumbers, scallions, cilantro and a sauce mixture which includes soy sauce, vinegar and 30 mystery spices. I'm pretty sure 2 of the mystery spices were fire and brimstone, but they sure were good.
An unidentifiable piece of lamb. Quite tasty though. Forgive the resolution, camera phones do not always focus when requested. 

Onward to the soup. With my trusty chopsticks I tried to pull out a noodle. This thing did not want to be caught. I would grasp and it would slip. I tried angling my chopsticks, poking the noodle and leveraging with a spoon. Finally I found some traction and pulled. 6 inches of noodle came out, then a foot, 2 feet and still more. I may be embellishing but this noodle could have been used as a soggy yard stick.

I contemplated the best possible way to eat the noodle, use a chomp and slurp technique, stuff the whole thing into my mouth or put it back in the bowl and grasp it in the middle? I wasn't going to let go and try catching the noodle a second time. I did not want it to warn it's noodle friends about me.
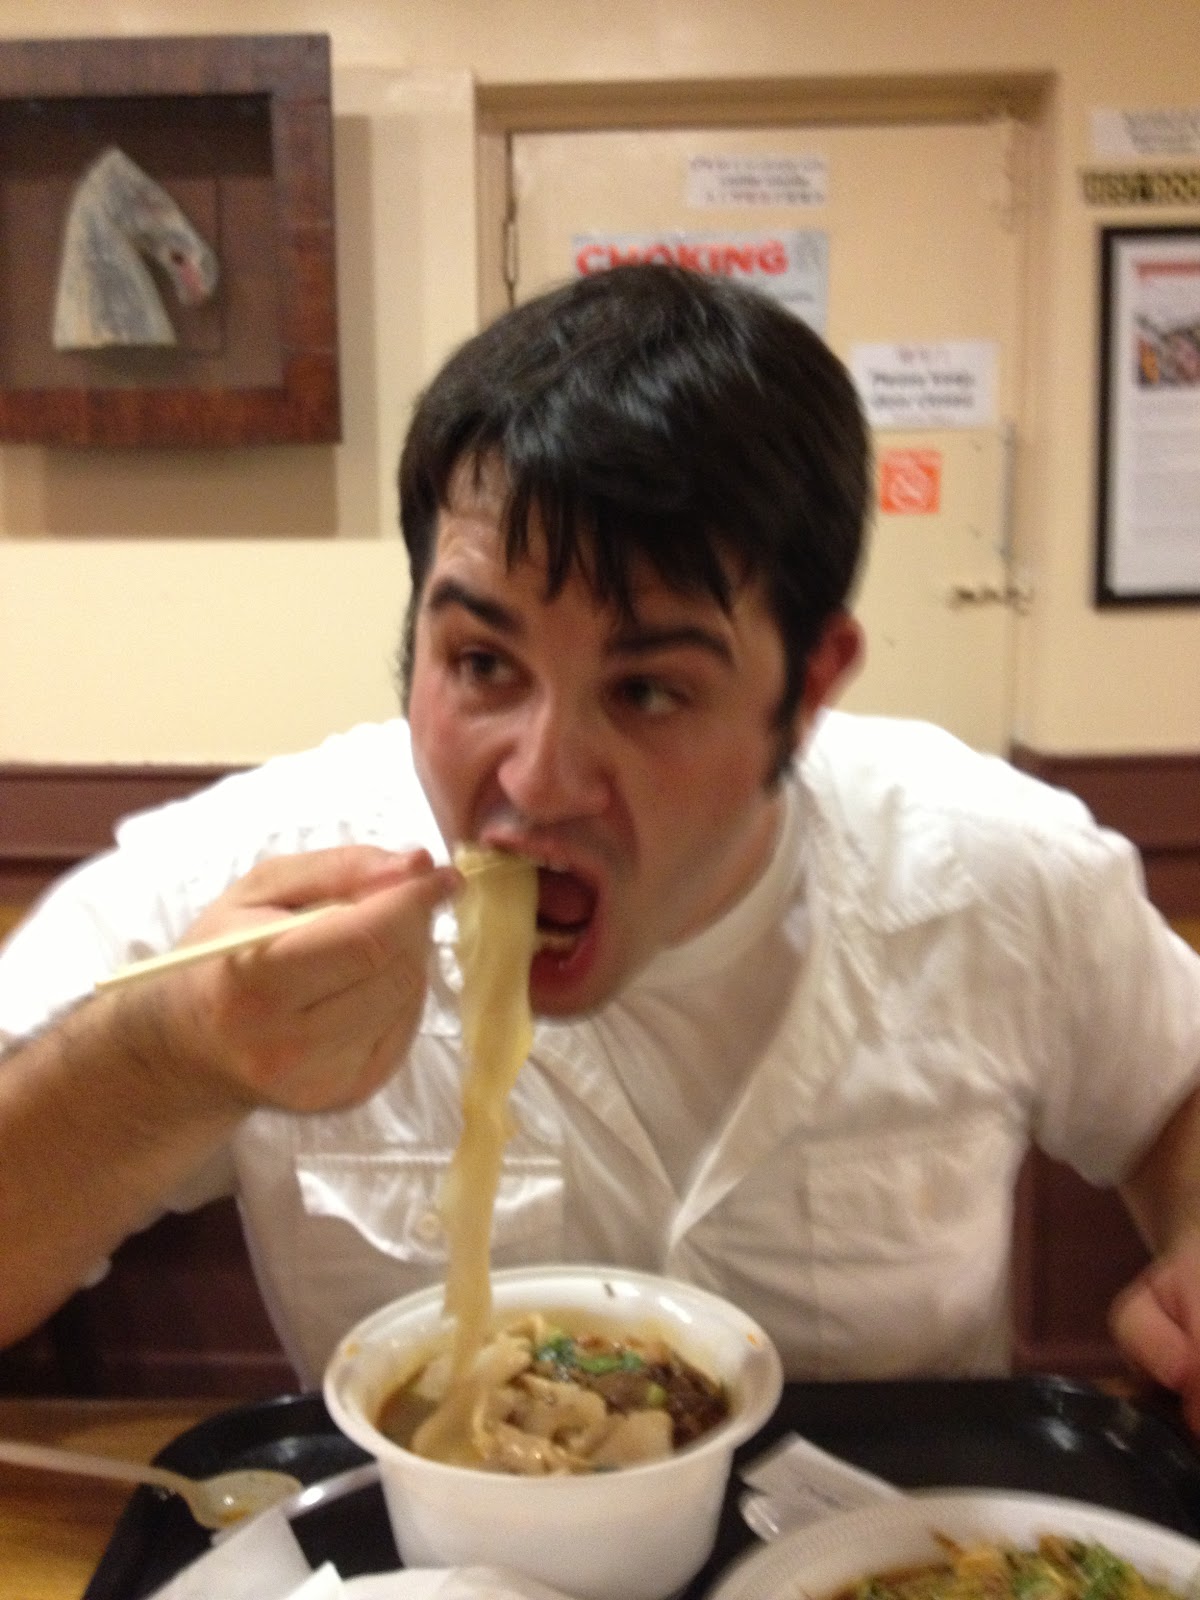
Quite possibly the most flattering photo of myself. The noodle is doubled over but it's still touching the bowl (which itself was huge)! 

I finally bit the bullet and took a bite. Chomping, slurp, move the chopsticks down the noodle and repeat. This worked until the noodle released its defense mechanism, heat. And I thought the salad was hot. My mouth was consumed by the heat of a thousand suns. A wave of flame consumed my body.  Fire coursed over my tongue and down my throat. Blood rushed to my face in order to cool my flame laden body. I slurped the noodle and took a gasp of air. Wow! Absolutely worth the heat. I blinked through the tears to look at my sister, I was red faced and happy. I grabbed for my water only to realize I forgot to ask for a glass. Onto the salad to cool off. Whoops, that's just as hot. To the soup, no to the salad, soup, salad, soup, salad, noodle, lamb face, cucumber, they all ended in flavor.

Eventually the point came where I could not take another bite. I put the soup and salad into separate bowls for later consumption. My sister and I walked out Xi'an and into the Chinatown Ice Cream Factory which was conveniently located next door. The green tea ice cream cooled my mouth. What a meal! Though during and at the end I was wearing some of it. At some point the flailing noodles flicked soup droplets onto my shirt. Lesson learned? never wear a white shirt when eating the world's longest noodles.


So if you're in New York City and have a cantankerin' hankerin' for heat and lamb, find Xi'an's in Chinatown. You won't regret it, just be sure to order a water.


Thursday, September 13, 2012

Breeding Season 2012

(photo) Two Katahdin rams demonstrating a Cross Your Heart Harness (left ram) and a Nylon Harness (right ram). These rams were put in with the ewes on Sept. 1.

Though this year’s lamb crop is still in the drylot, that doesn't mean Premier isn’t thinking about next year’s lambs. A few rams have been in with a select group of ewes since September 1st. We expect the ewes to start lambing around January 8th.

(photo) Moments before the rams are let out, Chloe the guard dog runs off to inform the ewes that the “boys are back in town.”

We are starting the breeding season in September instead of November because we have access to more indoor lambing space than in years past. We cleaned out a warehouse which had formally been a lambing barn. With the lambing barn returned back to its original purpose, we are now able to lamb more ewes indoors. This provides us with more space for lambing jugs, which we are more than happy to take advantage.

(photo) The rams eventually made up to the hill where the ewes were eagerly awaiting. 

The breeding season doesn't exactly start as soon as the rams walk into the pasture with the ewes. During the summer, we brought in several rams to use this breeding season. They will add fresh genetics to our hair flock. We also need to make sure that our other rams are in top condition before heading out to the pasture. Once in a ewe filled pasture, rams tend to think about things other than eating and maintaining condition.

(photo) A few days after turning the rams out with the ewes. The orange marks are from the marking harnesses and crayons, an efficient way to determine which ewes have been bred and which have not. 

While we're picking the rams and plumping them up, the ewes are on pasture once their lambs are weaned. Those that are on the leaner side are sorted for condition and given a weight gaining ration. Some are culled depending on age and condition. A month prior to lambing, ewes are flushed. This means they receive excellent nutrition to help their bodies be at peak fertility for breeding. This will provide us with more lambs during lambing season.

We bring the flock in once a week to check and see which ewes have been bred. We are able to determine this by using marking harnesses with crayons or raddle marker. Marks allow us to better determine when a ewe is expected to lamb. We switch the crayons each time they are brought in. A switch in color tells us which ewes were bred later and which ones were remarked.

Other happenings at Premier…

(photo) The crayon marks stayed on the ewes even after a thunderstorm (background) rolled through. 

The recent rains have rejuvenated our pastures. They have changed from dead brown hues to lush greens. On our North Farm we are strip grazing a grass/clover pasture. Every few days the shepherds set up a few additional rolls of ElectroNet and graze the ewes on a fresh strip of grass.

(photo) Strip grazing on the North Farm. Using ElectroNet to subdivide a large pasture so the flock makes efficient use of all the grass available. 

We're also getting a few of our feeder lambs ready for sale. We'll be weighing them to determine which lambs are finished. We will also be taking notes as to which ear tags are in the lambs ears. When the lambs were born, we put in tags denoting their sire types (Hamp, Suffolk, Siremax or home raised). This will tell us which sires produced the heaviest lambs.

(photo) After one week, the sheep were brought in and the tags of bred ewes were read and documented. The crayons on the harnesses were switched from orange to green. Harness were readjusted as they tend to loosen during the first day or two of use. 

It's catalog season! We've spent the last few months preparing our Equipment catalog. You should see it in your mailbox around the 3rd week of October. If you're not on our catalog request list, sign up here. It has many new items including drenchers, ear tags, scales, a sling for weighing ewes and even a new crook!


Hope the starting months of Fall are treating you and your flocks well.
-Premier


Tuesday, July 31, 2012

Best laid plans


The hot and dry weather has hammered our pastures as well as our flock for the last several weeks. In this weather the ewes are not overly motivated to graze, which is good considering the pastures have all but burned up. What are some of the things we are doing and not doing to ease the stress on our flock and pastures.

To alleviate the stress on our already brutalized pastures, we have started to feed baleage leftover from last year. The lush springs of 2010 and 2011 (which are but just a memory) provided us extra feed from the proceeding year. Since, 2010 we have had extra baleage, though it seems we will have just enough to get us to the hopefully green pastures of 2013. The Big Bale Feeders were pulled out of storage sooner than expected and our late born pasture lambs will be weaned sooner than anticipated, but as the saying goes "the best laid plans of mice and men often go awry."

photo: Ewes and lambs eating grass hay from a Big Bale Feeder. 

For those who maintain CRP land (Conservation Reserve Program), they are now able to hay or graze these pieces of land. Premier has a few employees who have CRP ground, we suspect they will take advantage of the grazing (check with your local FSA for rules and requirements). Premier has some ground that we keep as prairie. The sheep are on it in the Spring for lambing and are off it for the rest of the year. This year we will graze it in order to extend our grazing season before breaking into stored feed.


photo: Ewes grazing a late planted soybean field. Soybeans can tolerate heat better than some of the other grasses on our farm. 

When it comes to working the flock in the high heat, we do it only when necessary. For example, last week we had several ewes demonstrating classic worm burden symptoms; lethargic, loose stool and bottle jaw, thus they needed to be wormed. Worming in 100° weather is not comfortable for the sheep or the shepherd. So our shepherds drove and wormed the flock in the early hours of the morning while it was still cool. This cuts down on the amount of stress our ewes experience. 


photo: Building fence during a drought is not an easy task. The spikes often refuse to go into the hard dry ground. It is often necessary to use a drill to make a pilot hole for the spike (below). If you're lucky, there might be a crack in the ground where you want to put the post.


Monday, July 30, 2012

Determining the right poultry waterer

Summer typically brings a few questions regarding water consumption and chickens. Water consumption is hard to nail down as there are many factors that influence intake; salt and protein levels in the diet, humidity, temperature, productivity (growth or egg production) and the birds ability to process feed and water.

A quick internet search will show that the average daily consumption of a chicken is about .3 liters in the cooler months and up to .5 liters per day in warmer months. Remember that there are many factors that influence intake. 

To determine the number of birds per waterer, convert the gallons to liters (3.78 liters per gallon) and divide by .3 for cooler months and .5 for warm months. For example, a 5 gallon Quick Clean Bucket Waterer holds 18.9 liters of water. This is sufficient for 63 chickens in cooler weather or 38 in hot weather. It is best to have more water available than what is actually needed. 

Another way to think of it is, 7-12 birds per gallon of water. (1 gal = 3.78 liters = 7-12 birds). Make sure to always have clean and fresh water in front of your birds. If your birds run out of water between chore times, they a need a larger or an additional waterer. 


Wednesday, July 25, 2012

Drought fencing tips


It has been very dry throughout much of the country. Many of our incoming calls entail this question, "my fencing was working but now that it's dry it's not, why?" When the soil lost moisture it also lost conductivity. It is harder for the positive charge to travel from the fence, through the animal, ground and back to the energizer. Here are a few tips to help make sure your fences are up to the task. 

Make sure you have enough ground rod(s). A ground rod completes the electrical circuit between energizer, fence, animal, ground rod and energizer. Adding an additional ground rod can increase a fence's effectiveness. Soaking the area around the ground rod aids in conductivity as well. This can be done with a garden hose or a bucket with a small hole in the bottom. The slow leak from the bucket will seep into the ground over time (that way you won't have to stand around holding a garden hose. 

For those with short lengths of fence, it is helpful to walk along the fence and water it. This is a more time (and water) consuming option but it does help. 

Wide impedance energizers are able to deliver high-pulse energy levels and high voltages through a wider range of fence situations. This includes those with high total fence circuit resistance due to inferior polywire/netting; dry, sandy, rocky soils; dry brown grass; and fewer ground rods. 

Positive/Negative netting is useful for sites where soil resistance is high (brown grass, dry soil, snow). The horizontal strands of the netting alternate pos/neg. An animal needs to touch two strands, a positive and a negative, in order to receive a shock. Care must be taken to ensure that nothing is touching two wires at once (brush, grass, sticks) as this will render the net ineffective. 

In some cases an all hot (positive) fence will need to be converted into a pos/neg fence. it may be necessary to add wires to the system and ground them or change positive wires to negative wires in the system. Please call Premier 1-800-282-6631 if you have questions on this. 


Friday, July 6, 2012

Mad dogs and englishmen


The high heat and humidity is not only making us feel sluggish but our flock as well. The sheep do not enjoy grazing in the heat, thus their intake decreases and gains are not as significant as they are in cooler weather.


To beat the heat, the flocks spend a lot of time in the shade and close to their water sources. We also avoid working the animals to reduce the amount of stress they are exposed to during the heat of the day. If we absolutely have to work the livestock, we do it early in the morning to avoid the hotter parts of the day. Soon the heat will break and things can go back to normal. Until then we will have to be vigilant in providing cool drinking water and shade for our flocks.


As the saying goes, "only mad dogs and englishmen go out in the heat of the midday sun".

Thursday, July 5, 2012

Garden fencing


It seems that raccoons raid a garden just before it is ready to provide the first ear of corn or cucumber for the season. Many folks combat these pilfering pests by trapping, baiting and other means of discouragement. 

At Premier we respond to such situations with our answer to just about everything—electrified netting. In this case, RaccoonNet™and VersaNet®.


For specifically deterring raccoons, we like to use RaccoonNet. Its low height is easy to step over when going in and out of the garden. 


VersaNet features tighter spacings, multiple heights (20" and 30") and is available in white or green. Green VersaNet blends in nicely with the background which is more aesthetically pleasing to some. It is not as visible as white VersaNet.  


VersaNet is able to guard against a wider range of critters. The tighter spacings help ward smaller pests such as skunks and rabbits. White VersaNet is much more visible than its green counterpart, both humans and animals see it better. For areas that will experience high traffic (human or animal) white VersaNet is recommended. 


Wednesday, June 20, 2012

Making Small Squares


Last week we made small square bales from a clover field on our home farm. The bales will be used this winter to feed ewes in our lambing jugs. Their size makes them easy to handle, a bale fits well in our drive-by/walk thru feeder or a flake in one of our single or double sided hay feeders. 

Danny and Adrian were on the rack while Carl drove the tractor. When the rack was full it was hauled to the hay barn. When the rack was unhooked, Carl and Danny returned to the field with an empty rack and back to baling.

Adrian went to get the tractor with the bucket to push the rack into the barn. To be productive while waiting for Adrian, I tried pulling the rack into the barn by hand. It was 1/3 of the way in when Adrian arrived to push. As it turns out, it's easier to use the tractor to push the wagon than it is to pull it by hand! We brought the wagon into the barn front end first because it allows us to unload directly into the hay mound (instead of working around the gallous on the back).


While unloading, Adrian placed bales on either side of the tongue and onto the tongue. This formed a ramp/bridge. Adrian would drop bales onto the ramp and they rolled to where I was stacking. When the rack was emptied we would haul it back to the field and trade for the rack Danny and Carl just filled.

When we finished, the barn had an additional 4 racks of hay stuffed inside and we were ready for an iced tea!

Friday, June 15, 2012

Processing Lambs 2012


The other day Carl poked his head into Graphics and asked for some help processing lambs. Since it was a beautiful June morning, I did not hesitate in offering my assistance. After a quick change into "chore clothes" plus a short drive to the North farm, I was ready to process lambs.

Processing involves running the ewes and their lambs through the handling system and pulling out the lambs. At Premier we dock tails and castrate the males. To dock and castrate we use a Ring Expander (also known as an elastrator) and O Rings. If a tail is particularly thick we may use two rings. After the rings are applied, we pour a Pine Tar and Triodine-7 mixture on the rings to prevent infection and to ward off flies. 

Ear tags were also applied and documented during processing. Ear tags allow us to immediately know sire data, age of the lamb and whether it was a single, twin or triplet. An ear tag can tell us all this by color, which ear it is placed in as well as the data included on the tag. We plan to track the weight and performance of our lambs to determine which sire produced the best lambs. After the tag is applied, we spray Catron IV onto both sides of the tag to keep the flies from bothering the wound. 

For instructional videos on tagging, docking and castrating, visit the video section of our website http://www.premier1supplies.com/videos/index.php

There were four of us involved in processing lambs. It seemed to be the right amount. Each person had a specific job:
Carl: Castrate lambs, apply pine tar and spray with sprayline if needed. 
Mike: Dock tails and apply pine tar. If a twin born ewe, notch the ear. 
Joe: Tag and document the ear tag. Spray Catron IV on the ear. 
Adrian: Catch and hand off the lamb. 

We were able to do about a lamb per minute (112 lambs in 2 hours). This also included bringing the sheep in from the field, setting up the handling system and running the flock back through the handling system. 


Wednesday, May 23, 2012

Clipping and Shearing

We receive a few calls/emails throughout the year on what clippers or shears folks need for their livestock. The answers depend on what the individual is shearing/clipping and for what purpose (ex. range shearing or show shearing/clipping).
(photo above) A Premier 4000c Clipping Machine.
(photo below) a Premier 4000s Shearing Machine


Sheep:
Farm/range flocks for meat or fiber have their wool removed via shearing. We recommend a Phantom R comb for folks just starting out with shearing. For intermediate shearers, the Spirit or Blackhawk 92 are advised. Professional shearers tend to use a flared comb based on the bevel needed or a 9 tooth comb (Apache) with the Storm cutter.

Show stock—meat lambs are slick shorn to accentuate their muscling. Slick shearing (slick clipping) is done with a set of clippers with Fine, Surgical or Super Surgical blades.


Fiber animals and some breeding animals are blocked with a shearing machine. Since blocking occurs off the skin, a Phantom S comb is recommended.


Goats:
Meat goats in the show ring should have their hair removed with a clipping machine rather than shears. Typical blades are the Fine, Medium or XtraCover.


Goats raised for the fiber- use a shearing machine with the Phantom R or Mohair combs.

Cattle:
For blocking cattle use a Phantom S comb with a shearing machine.
Peeling is usually done with a Medium or Coarse set of blades on a clipper. If using a shearing machine, the Phantom R should be used.
Shaving is usually done with a clipping machine with Fine or Medium blades.


Horses:
Horses can be clipped with either Fine or Medium blades.


Swine:
A clipping machine with XtraCover blades should be used.

Guard Dogs:
We typically clip our dogs with Coarse blades and a clipping machine.

Llamas and alpacas:
When clipping llamas and alpacas use Coarse blades.
When shearing the following combs can be used: SpiritCamelidMohairPhantom R and Blackhawk 92. If more fiber is to be left on the animal, a Comb Lifter can be used to keep the comb off the skin.


Terminology—
*Blocking: Removal of wool or hair off the skin. The comb or cutter of the shearing machine does not touch the animal.
*Peeling: Removal of dirty body hair with clippers or shears.
*Shaving: Removal of hair from the head, brisket and tail.
*Clippers/Clipping machine use clipping blades (Super SurgicalSurgicalFineMediumCoarse and XtraCover).
*Shearers/Shearing machines use combs and cutters. The combs are Spirit, CamelidApacheMohairBlackhawk 92Blackhawk 94Phantom R and Phantom S. The cutters are the SpitfireStorm and Ceramic cutter.
All combs except for the Apache should be used with the Spitfire cutter. For efficient shearing, we recommend using the Apache with the Storm Cutter, but only if you are an experienced shearer.


Friday, May 11, 2012

Netting tips

During this time of year we receive a number of questions on how to (and how not to) use electrified netting. Here are a few of the tips we provide:

How to connect two separate rolls…


The end posts of the two separate rolls should be inserted into the ground next to one another. With one of the provided strings (used to tie the roll together), tie the end posts together near the top.
Clip the metal clips together or use a PowerLink to connect the clips (this makes a handy gate option).

What to do with the metal clip…


If you have a length of net that has an unused clip (one that is not carrying power to another fence), it can be connected to one of its strands. This keeps the clip from potentially contacting a grounded wire or fence.


Do not attach clip to an un-energized fence for support. This will cause a dead short.

What to do with extra netting…
If you find you have a few extra feet of netting and need to terminate your fence, guide the extra length around a PowerPost or FiberRod (1/2" to 11/16") to make a U-Turn .

Common mistakes:
More often than not, when someone returns a roll of net, it has been rolled up incorrectly. Some folks roll the entire net (like a carpet) instead of folding (via the posts) then rolling the net. Folding then rolling is faster and easier than rolling. An improperly rolled net causes numerous (avoidable!) headaches.

Not energizing the net. Electrified netting must be properly electrified in order for it to be fully effective (and safe). Un-eletrified netting encourages bad habits in livestock and can be lethal.

Sometimes the bottom electrified strand (2nd horizontal wire from the bottom) can get caught around the ground spike of the net post. This causes an instant dead short in the fence. Make sure when installing netting, that the spikes haven't caught any errant strands.


Make sure the fence is well tensioned (by hand). If not, sagging can occur which may lead to the lower strands causing the fence to short out.


Thursday, April 26, 2012

Lambing Supplies


During lambing season we keep a few totes of lambing supplies in the lambing barn. This saves us several back and forth trips between the barn and the "mudroom". The following list will cover general lambing supplies. If you have any questions regarding vaccinations, treatments or procedures please consult your veterinarian.

Items we keep in the lambing barn—

Gloves—we keep both latex gloves and OB gloves on hand for when we are pulling lambs. We usually wear a latex glove over an OB glove for added dexterity.

SuperLube—an antiseptic lubricant used when pulling lambs or applying ear tags.

"O" Rings and Ring Expander—for docking and castrating. We dock and castrate within 3 days of birth.


(photo) "O" Rings and Ring Expander in use. Carl is pressing the lamb's belly in order to push the testicles into the scrotum. This ensures both testicles are removed during castration. 

Ear Tags and Premier Applicator—animal identification. This year we are using ear tags to denote the sire of the lambs.

Triodine and Navel Cup—Triodine dries navel cords to reduce the risk of infection through the navel.

Prolapse Harness—used to hold a vaginal prolapse in place long enough to get the ewe to her lambing date. Often used in conjunction with a Prolapse Retainer.

Sprayline—we write matching numbers on the ewe and lambs for identification. Also used to mark orphan lambs or lambs that need extra attention.

Clear or plastic Tube and Syringe—we tube newborn lambs with colostrum and unthrifty lambs with milk or colostrum.

Thermometer—used to check the temperature of the lamb.

Disposable Needles and Syringes—to provide various injections. Consult your veterinarian to determine your vaccination protocol.

Ear Notcher—we notch the right ear of all twin or triplet ewe lambs to mark them as potential replacement ewes.

Items we have on hand that don't fit into the totes—


Bucket Teat Units and Milk Replacer—for orphan lambs or to supplement small triplets. Will also need Rubber/Latex Nipples and Bucket(s).

Heat Lamp—we hang one of these over a creep feeder to provide light/warmth to encourage lambs into the creep area.

Orphan Head Gate—holds a ewe in place so a lamb is able to feed. Usually used when grafting lambs to ewes. (photo below)


(photo) Ewe in the Orphan Head Gate.

Creep Feeder Gate—a gate with a series of bars that let only lambs enter the creep area. (photo below)


(photo) A Creep Feeder Gate in use. Lambs have access to supplemental creep and milk replacer.


Thursday, April 19, 2012

Lambs on the pasture

The first few weeks of the lambing season have gone well for us. The Home Farm ewes are almost done lambing and the ewes on the East Farm look about ready to pop!

Photo: Ewes and lambs grazing alongside ElectroNet Plus

Most of the lambs on the Home Farm are from our home raised ewes that were bred to Hampshire and Suffolk terminal sires. These lambs will be raised for meat. We have a few ewes that were bred to our home raised rams (Border Leicester/Ile de France). The ewe lambs from this cross will be used as replacement ewes.

Photo: This year we are tagging lambs with the ID of their sire. We used several types of lambs last fall for tupping. The lamb ID will allow us to determine which sire produced the best lambs. The Easy Tag II size 2 is imprinted with the sire's breed, current year and Premier logo.
On the Home Farm, newborn lambs and their dams are kept in lambing jugs to aid with bonding. The family units are put on pasture after 3 days in the jugs. The ewes enjoy grazing the lush grass and the lambs enjoy bouncing throughout the field.


Last Thursday we moved the flock onto a wheat field. The field was planted last summer for grazing this spring. Due to the early spring, the field is a few weeks ahead in growth. We've had our yearling ewes grazing an adjacent wheat field (mentioned in a previous post) but this field has not been significantly grazed. The ewes and their lambs should be able to tame the "runaway" wheat. If we left the field lay until we would normally put sheep on it, the wheat would be more mature and less palatable to the sheep.


While moving the sheep, Mike noticed that one of the lambs was smaller than it should be for its age. This is typically a sign of something being wrong with the lamb or its mother. We separated the lamb, its twin and their mother from the flock and brought them back into the lambing barn for observation. We were able to match the lambs and dam by the numbers they had on their sides (we marked ewes and their lambs with Sprayline in order to match them for just this situation).


We will wean the lambs at around 60 days. There are a few variables that can affect the weaning date such as grass quality/quantity, worm load and animal condition.

Monday, April 9, 2012

Out of the woods yet?

Mike and Carl have been rearranging a few of the pastures on the Home Farm. Their goal is to graze a thicket adjacent to one of the permanent pastures, but they needed a fence.

The area in question contains a few ups and downs as well as curves. Carl set up a few rolls of our ElectroNet® Plus. It's the same net as our original ElectroNet® but with a few more posts. It adapts to curves and corners much better and can handle more up and down strain.


Prior to setting out the netting, Carl went through the thicket and pasture with the mower to determine his. If you can't mow, driving over the grass once or twice or trampling it with your feet will suffice. Be sure to clear any brush (if possible) away from the netting to reduce energy drainage. Mowing ahead of time also removes any sticks or debris that could get caught in the net while setting it up. 


Gripping the posts as a group, lift them in front of you and unfold the net by feeding out each post as you walk back wards. It you're not comfortable walking backwards, hold the posts in one hand (if you can) and feed the posts out with the other.


Plus netting is very handy to have in situation where there are a lot of twists and turns in the fence line. The shorter distance between the posts allows for quick directional changes. 


Since ElectroNet Plus is designed for curves and corners, double spikes are included to aid with the side strain. 


When connecting two rolls together, make sure to connect the metal clips together for a strong electrical connection.


After you've made the connection between rolls of fence, continue setting up the remainder of the fence.


Once your fence is installed, connect it to the energizer for optimal effectiveness.